
Teamstatistieken

  • Field goals %

    • SLC49,0
    • 43,0SCW
  • Driepunter %

    • SLC42,0
    • 41,0SCW
  • Turnovers

    • SLC12
    • 20SCW
  • Rebounds

    • SLC42
    • 50SCW

Wedstrijdinformatie

Kaiser Permanente Arena

Coverage: NBAGLeague.com
  • Santa Cruz, CA
Toeschouwers: 2.476
Kaitlynn Versoza, Italo Araujo, Tommy Wu
1234T
Stars22403338133
Warriors33232324103

Wedstrijdverloop

SLC
SCW
0:00 - 4e Quarter

SLC

133

SCW

103

End of Game

Schot grafiek
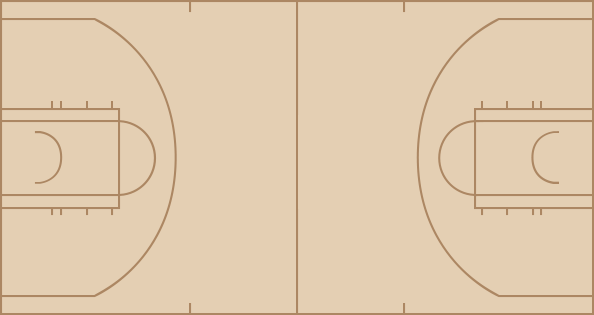
  • Mo Bamba makes 25-foot three point shot (Elijah Harkless assists)
  • Mo Bamba misses layup
  • Cody Williams misses 14-foot two point shot
  • Cody Williams misses 9-foot two point shot
  • Taylor Hendricks misses 23-foot three point jumper
  • Mo Bamba makes tip shot
  • Cody Williams misses 27-foot three point shot
  • Cody Williams misses 22-foot three point jumper
  • John Tonje makes 23-foot three point jumper (Max Abmas assists)
  • Max Abmas makes 27-foot three point jumper (Sean East II assists)
  • John Tonje misses 26-foot three point jumper
  • Cody Williams makes 10-foot step back jumpshot
  • Elijah Harkless misses 26-foot three point jumper
  • Matthew Murrell makes 24-foot three point shot (Elijah Harkless assists)
  • Ja'Vier Francis blocks Elijah Harkless 's 9-foot two point shot
  • John Tonje makes 23-foot three point jumper (Cody Williams assists)
  • Max Abmas makes 23-foot three point shot (Sean East II assists)
  • Steve Crowl makes tip shot
  • Sean East II makes 16-foot pullup jump shot
  • Elijah Harkless misses 26-foot three point jumper
  • Cody Williams misses 26-foot three point jumper
  • Matthew Murrell misses 25-foot three point jumper
  • Mo Bamba makes 26-foot three point jumper (Elijah Harkless assists)
  • Taylor Hendricks makes 6-foot two point shot (Mo Bamba assists)
  • Taylor Hendricks makes 2-foot dunk (John Tonje assists)
  • Cam McGriff misses 26-foot three point jumper
  • Sean East II makes 16-foot pullup jump shot
  • Sean East II misses 25-foot three point pullup jump shot
  • Sean East II makes driving layup
  • Max Abmas misses 22-foot three point jumper
  • Max Abmas misses 23-foot three point jumper
  • Elijah Harkless misses 22-foot three point jumper
  • Cody Williams makes 13-foot two point shot
  • Elijah Harkless makes 26-foot three pointer
  • Jack Clark blocks Taylor Hendricks 's 5-foot layup
  • Elijah Harkless misses 26-foot three point jumper
  • Max Abmas makes 23-foot three point jumper (Sean East II assists)
  • John Tonje makes 26-foot three point jumper (Steve Crowl assists)
  • Cam McGriff misses alley oop dunk shot
  • Sean East II makes driving layup
  • Jack Clark blocks Steve Crowl 's 4-foot two point shot
  • Cam McGriff makes 24-foot three point shot (Steve Crowl assists)
  • Sean East II makes driving layup
  • Hank Morgan makes 22-foot three point jumper (Cam McGriff assists)
  • Steve Crowl makes 2-foot dunk (Max Klesmit assists)
  • Taevion Kinsey makes 3-foot driving dunk
  • L.J. Cryer makes 8-foot driving floating jump shot
  • Taevion Kinsey misses 7-foot two point shot
  • L.J. Cryer misses 25-foot three point shot
  • Michael O'Connell makes 24-foot three point shot (Jack Clark assists)
  • L.J. Cryer misses 7-foot two point shot
  • Ja'Vier Francis misses tip shot
  • Riley Grigsby misses 26-foot three point jumper
  • L.J. Cryer makes 10-foot driving floating jump shot
  • Michael O'Connell makes 5-foot two point shot
  • Marques Bolden makes 24-foot three point jumper (Jack Clark assists)
  • Michael O'Connell misses driving floating jump shot
  • Mo Bamba blocks Taevion Kinsey 's 6-foot driving layup
  • Taevion Kinsey misses 9-foot two point shot
  • Taylor Hendricks blocks Taevion Kinsey 's 2-foot dunk
  • L.J. Cryer makes 24-foot three point jumper (Michael O'Connell assists)
  • Ja'Vier Francis misses 6-foot two point shot
  • Michael O'Connell misses 26-foot three point shot
  • Jack Clark misses 16-foot two point shot
  • Jacksen Moni misses 26-foot three point shot
  • Steve Crowl blocks Jacksen Moni 's 5-foot driving layup
  • Jacksen Moni misses 25-foot three point jumper
  • Riley Grigsby makes layup
  • Jack Clark misses 5-foot jumper
  • Ja'Vier Francis misses dunk
  • Marques Bolden makes 26-foot three point jumper (Michael O'Connell assists)
  • Marques Bolden misses 9-foot two point shot
  • L.J. Cryer misses driving floating jump shot
  • Ja'Vier Francis makes 3-foot dunk
  • Mo Bamba blocks Taevion Kinsey 's 4-foot layup
  • Mo Bamba blocks Ja'Vier Francis 's 4-foot two point shot
  • Ja'Vier Francis misses 4-foot two point shot
  • Jack Clark makes 26-foot three point jumper (Taevion Kinsey assists)
  • Michael O'Connell misses driving floating jump shot
  • Jack Clark misses 25-foot three point jumper
  • Jack Clark misses 3-foot jumper
  • Marques Bolden makes 3-foot driving dunk (L.J. Cryer assists)
  • Marques Bolden misses 26-foot three point jumper
  • Michael O'Connell makes 12-foot pullup jump shot
  • Ja'Vier Francis misses layup
  • Taevion Kinsey misses driving layup
  • Michael O'Connell misses 26-foot three point jumper
  • Ja'Vier Francis makes 2-foot dunk (Taevion Kinsey assists)
  • Jack Clark makes 25-foot three pointer
  • Marques Bolden misses 8-foot two point shot
  • Michael O'Connell makes 7-foot two point shot
  • Marques Bolden misses driving layup
  • Marques Bolden misses 25-foot three point jumper
  • Jack Clark misses 26-foot three point pullup jump shot
  • Jack Clark misses driving layup
  • Michael O'Connell misses 4-foot pullup jump shot
  • Jack Clark misses driving layup
  • Taevion Kinsey makes 2-foot driving dunk
  • Michael O'Connell makes 15-foot pullup jump shot
Data niet beschikbaar op dit moment.